Alright, you guys have helped me a ton in the past, and while I have been pretty busy recently and what not, I've been able to work on a few soaker here recently since we have cut back hours at work.
Anyway, I have 2 things Im asking for help with.
First, I need some advice on painting a super soaker. I want to know what type of paint is best. I can't see spray paint sticking very permanently, on plastic like that would'nt it just flake? Is there a product that will help the paint hold up or what is common place? I read the article on painting. No offense to is author but it really didnt tell me anything except "painting can be good to do" "be careful" "use tape on moving parts to prevent sticking" all things that are common sense with painting anything. Im looking more for speciffics since I have never really painted anything with this type of plastic.
Second, a friend of mine has a CPS 4100, and I believe it has the trigger problem everyone refers to anytime the 4100 is brought up. The little mechanism that is pulled out causing the pressure to release is sticking anytime there is any pressure in it, i tried some heavy lubrication since in do scientific order, you always look for the most simple explination first. While the lubrication allowed me to pressurize it with air and shoot it, as soon as water came into the issue, it stiffed up. So is this the infamous 4100 trigger malfunction? Or do I need to post pictures of where the problem is? I thought about adding a spring to push it back but it seems like its going to be difficult to do, it will also make it more difficult to pull the trigger. if worst comes to worst I may try this but if there is a standard fix it for this I would really appreciate hearing it.
Any suggestions please post!
I also just want to thank you guys again for all the help you've given me, my soaker collection has grown quite a bit and I have performed several operations, and I have all of you to thank, everything I know I've learned from you guys.
Painting A Super Soaker/The Infamous CPS 4100 Prob
-
forestfighter7
- Posts: 252
- Joined: Mon Apr 10, 2006 11:26 pm
- Location: Santa Cruz, CA
- Contact:
Hi, For the Painting issue all you have to do is get spraypaint ( i would try water-proof) and covor up the parts you don't want sprayed eith tape and spray on. I'm not much of a repair man so I can't help you with your second probllem
If you would like to join the Superior Water Attack Team please pm me.
The soaker chooses the user, Harry Potter...


The soaker chooses the user, Harry Potter...
Spray paint is as good as it'll be for anything else. So it will fade over time. But do NOT paint on moving parts--if they work without the paint, then they're fine. Adding layers of paint will likely cause jamming!
The second problem sounds like the potential for a broken trigger. A new spring and lubrication won't help. But with the soaker open, look for whitening on the actual orange of the trigger--that's weakening. If it's a Mark 2, then you'll notice that there are two parts of orange trigger, connected only in a tiny corner. It's weak, and you should do a trigger repair but beforehand, as a reinforcement.
The second problem sounds like the potential for a broken trigger. A new spring and lubrication won't help. But with the soaker open, look for whitening on the actual orange of the trigger--that's weakening. If it's a Mark 2, then you'll notice that there are two parts of orange trigger, connected only in a tiny corner. It's weak, and you should do a trigger repair but beforehand, as a reinforcement.
alright I dont think your getting what my problem is, the trigger is fine. Here are some pictures to help.
Ok do you see the orange piece with the spring around it? well it is attached to that metal nail like piece, when it is pulled is when the water is released. Well it was sticking, after lubricating it i was at least able to pump it with air and it would release, but as soon as i put water in it, it would stick in the out position.
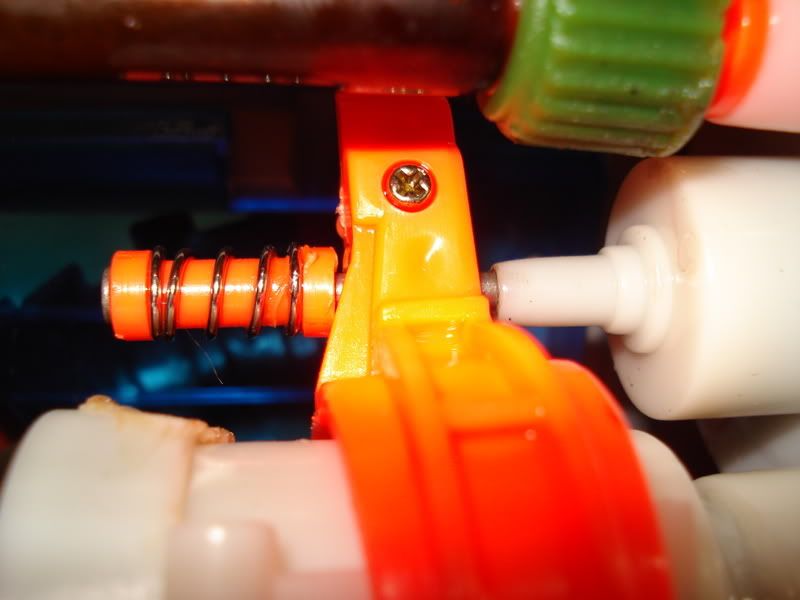
Now when I was looking at it to take pictures i noticed that that orange piece is broken on the end, althought I can NOT figure how that would affect it at all. it should still work.
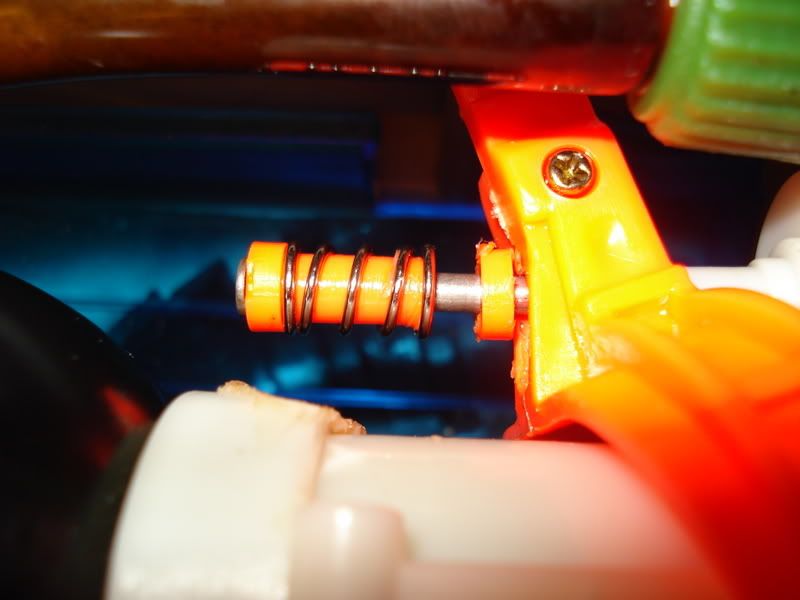
This picture shows the end of the orange piece seperate from the main.
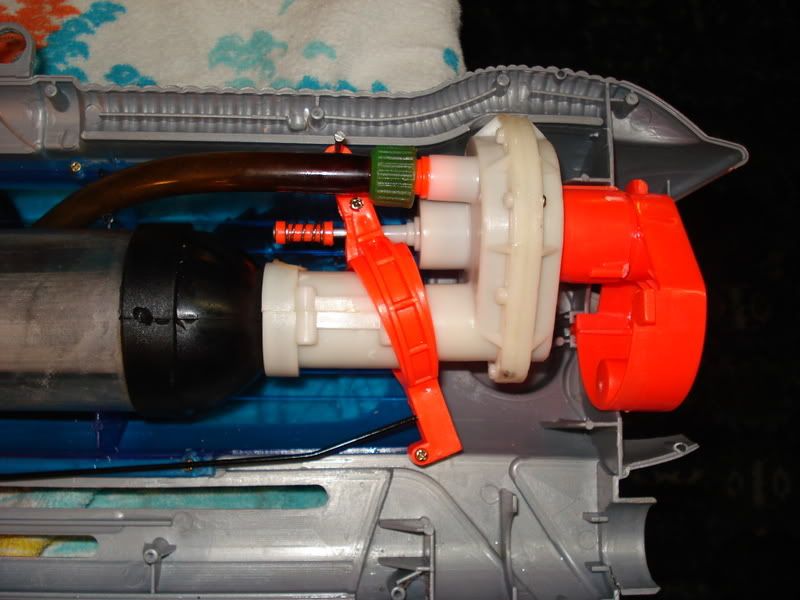
For you to understand what area this part is in, here is a pulled back shot.
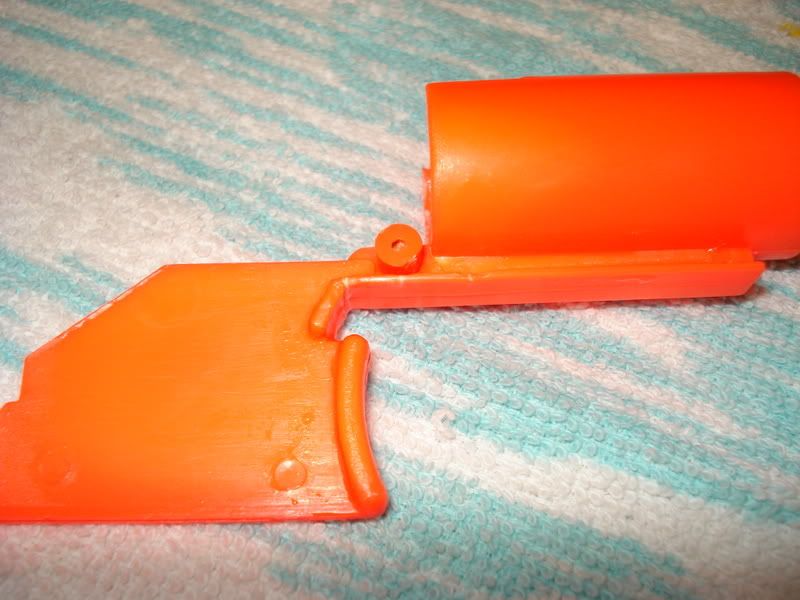
If you doubt my inspection of the trigger, here is a picture of that too. but it looks fine, I know that isnt the real issue.
Alright i tried to be more thorough for you guys. if you need another pic just request.
And with the painting, fading wasn't what I was afraid of, Im afraid it will flake off but if that doesnt happen than i'll try spray painting.
Ok do you see the orange piece with the spring around it? well it is attached to that metal nail like piece, when it is pulled is when the water is released. Well it was sticking, after lubricating it i was at least able to pump it with air and it would release, but as soon as i put water in it, it would stick in the out position.
Now when I was looking at it to take pictures i noticed that that orange piece is broken on the end, althought I can NOT figure how that would affect it at all. it should still work.
This picture shows the end of the orange piece seperate from the main.
For you to understand what area this part is in, here is a pulled back shot.
If you doubt my inspection of the trigger, here is a picture of that too. but it looks fine, I know that isnt the real issue.
Alright i tried to be more thorough for you guys. if you need another pic just request.
And with the painting, fading wasn't what I was afraid of, Im afraid it will flake off but if that doesnt happen than i'll try spray painting.

All spray paint flakes off after some time. You can use clear lacquer to help protect the paint for longer. Never just spray on the paint without protection.
As for the trigger valve issue, does it stick out before you try to shoot or after? AKA, does it override the trigger and cause water to pour out when you pump? Or does it simply not shoot? A rubber band repair may solve the problem, but it is important to note whether it is pump-shooting or not shooting. It is also important to note if it pump-shoots after doing a rubber band repair, as that indicates a problem within the valve itself.
As for the trigger valve issue, does it stick out before you try to shoot or after? AKA, does it override the trigger and cause water to pour out when you pump? Or does it simply not shoot? A rubber band repair may solve the problem, but it is important to note whether it is pump-shooting or not shooting. It is also important to note if it pump-shoots after doing a rubber band repair, as that indicates a problem within the valve itself.
marauder wrote:You have to explain things in terms that kids will understand, like videogames^ That's how I got Sam to stop using piston pumpers

So, when pulling the trigger, it is not pulling on the rod properly. If you pump up the soaker partially, can you pull on the rod to make it fire from the nozzle or has something really gotten jammed up in the nozzle valve region?
As for paiting, for have a paint-job last longer, I'd recommend using some primer meant for painting plastic before applying the coloured paint layer. As well, as you seem good at disassembling soakers, it'd be best to paint the body when separated from the internals to avoid gumming up any of the moving parts or nozzles. Of course, you can always use tape to cover important parts that should not be painted closed.
As an aside, I'd like your permission to repost your images and/or repair and painting information on iSoaker.com as things progress.
:: Leave NO one dry! :: iSoaker.com .:
-
wetmonkey442
- Posts: 596
- Joined: Mon Jul 05, 2004 8:36 am
- Location: Connecticut
As far as the trigger repair is concerned, the plastic parts of the trigger valve may have warped slightly to inhibit free movement of the metal release valve. Using any sort of repair (including the rubber band repair) will not be only partially effective, but also poses the risk of weakening the plastic of the valve over time, if this is the case. Try moving the metal rod by hand, and notice if there is tension and if where, how much and how long the tension exists. Also try to wiggle the rod and turn it in the trigger valve housing. If it's wedged hard against the plastic, this could very well be your problem.
As far as painting goes, I've done my fair share of paint jobs over the span of my water warfare career, and I can tell you that the best way to ensure a nice even and clean paint job is to make sure the plastic of your gun is clean and free of dirt. Then soak the shell in warm soapy water. This will remove a lot of oils and surface grim that might not appear very obvious at first, but will work over time to mar and weaken the bond between the paint and the plastic. Once you've let the plastic soak for awhile, rinse it off thoroughly with water, and let it dry for a while, or you can pat dry it. Then paint in outside on a sunny day with no wind and preferably low humidity.
This time of year (north of the equator) is the perfect time to paint guns because of the low humidity. In terms of what paint to use, I'd recommend Krylon Fusion spray paint. It works pretty well, however you can get results with any plastic spray paint as long as you let it dry for a good three to four hours. To get a good result, I'd also recommend another coat and then let it dry overnight before touching it. If your plastic is clean, you really shouldn't need any primer. One or two good even coats should do the job for you. Make sure to begin spraying off of the plastic, and then end your spray stroke off of the plastic on the other side. This will help you to avoid paint building up when you first spray, and then running which can ruin a paint job.
Also, start painting in the morning outside. That way, you can let it dry outside for the longest amount of time. In addition, fresh air is always better for drying paint jobs that any air that would be circulating inside of a basement or garage. At night, let it dry somewhere where the fumes won't be too obnoxious. If you know you're going to have good weather, you can even let it dry outside overnight.
Hope that helps.
Can I have your permission to repost the images of your CPS 4100 on Downpour?
Soak On
Join the fight! Support water warfare in your area today!
Whew...that was a great article, wetmonkey! Definitely post it on Downpour.
Would you mind clarifying this? It's a bit confusing, but I'm probably just missing something.
wetmonkey442 wrote:Make sure to begin spraying off of the plastic, and then end your spray stroke off of the plastic on the other side. This will help you to avoid paint building up when you first spray, and then running which can ruin a paint job.
Would you mind clarifying this? It's a bit confusing, but I'm probably just missing something.
yeah you guys can repost any thing you want as long as you use your own space, so permission granted isoaker and wetmonkey. isoaker I will definetly get you some pictures of the painting process but Im not completely sure when I will get around to accually doing it, but when I do I will get some pics up. Im planning on painting a CPS 1200, becouse its the model that some regaurd as more powerful, its pretty ugly, but its a sturdy gun that I was able to get it for cheap. Im thinking about going yellow parts silver/purple parts black. While I havent tried too hard yet Im not sure how to get the huge orange piece off the end of the gun.
Now as to the 4100 isoaker, when the gun is partially or fully pumped, when i try to pull the rod out will go to maximum length and its still stuck, I am afraid there is something unrepairable with the valve. Wetmonkey I really like your idea of the rod being bent, I hadnt thought about that, next chance I get Im going to check it out. Thanks alot for the tips on painting also.
Now as to the 4100 isoaker, when the gun is partially or fully pumped, when i try to pull the rod out will go to maximum length and its still stuck, I am afraid there is something unrepairable with the valve. Wetmonkey I really like your idea of the rod being bent, I hadnt thought about that, next chance I get Im going to check it out. Thanks alot for the tips on painting also.
If you can pull the rod out and the soaker is still not firing, it would seem that the rod has lost its ability to pull on the actual valve-seal inside the trigger valve and only works some of the time. You might want to check out this Nozzle Valve Repair article that unfortunately doesn't have pics. Though the symptom of the break is opposite than your case (i.e. in the article, the soaker kept firing when pumped), I think the cause of the problem is the same.
I can't comment much more on the repair, though, as I've never personally attempted to open a nozzle-valve yet.
I can't comment much more on the repair, though, as I've never personally attempted to open a nozzle-valve yet.
:: Leave NO one dry! :: iSoaker.com .:
-
wetmonkey442
- Posts: 596
- Joined: Mon Jul 05, 2004 8:36 am
- Location: Connecticut
Thanks for the kind words Silence. Actually, for Downpour I was thinking about writing a slightly more detailed article along with a bit of a walk through as I paint a CPS 2100.
Yeah, I knew that part would come across as confusing. Here's a picture to show you what I mean:
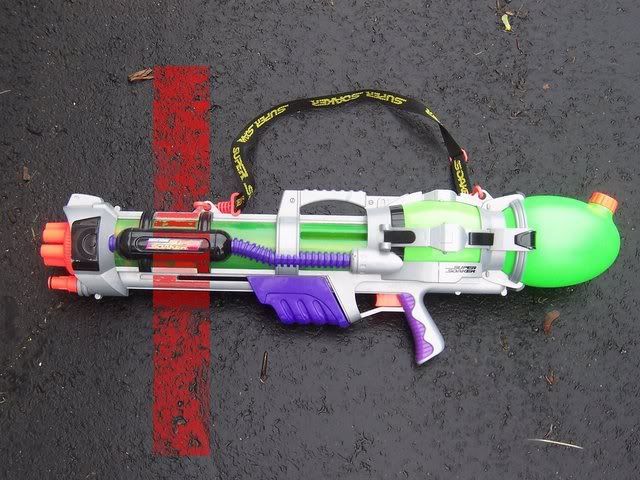
The red represents your stroke. You wan to begin the stroke off of the plastic and end the stroke off of the plastic. It should all be one fluid motion. Stopping anywhere over the plastic, even for a split second will create a build up, and make the surface look uneven. This applies to painting anything, not just Super Soakers.
Also, some newspapers are recommended, as you don't want to be spraying directly onto your driveway!
Yeah, I knew that part would come across as confusing. Here's a picture to show you what I mean:
The red represents your stroke. You wan to begin the stroke off of the plastic and end the stroke off of the plastic. It should all be one fluid motion. Stopping anywhere over the plastic, even for a split second will create a build up, and make the surface look uneven. This applies to painting anything, not just Super Soakers.
Also, some newspapers are recommended, as you don't want to be spraying directly onto your driveway!
Join the fight! Support water warfare in your area today!
Just a note, is that water tube leading to the nozzle supposed to be black? If not, it's probably sludge.
My Armoury: Storm 750, CPS 4100, Triple Aggressor, Blazer, SI Flash Flood (Nozzle Drilled), 100 oz. Aquapack, MONSTER X (2002), WW Argon, A.R.M. 4000 XL, MI Defender, MI Helix, Water Weapons Waveblast, CPS 2700
My "broken" Armoury: CPS 4100, XP 55
My "broken" Armoury: CPS 4100, XP 55
Who is online
Users browsing this forum: No registered users and 12 guests