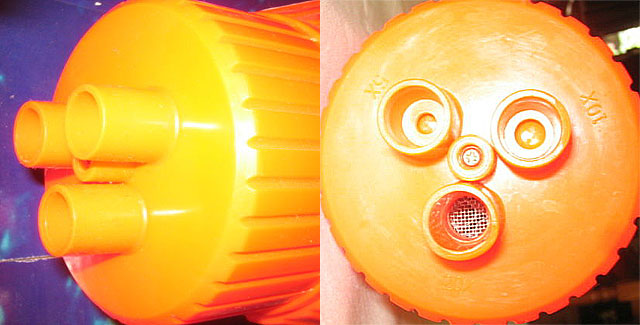
I don't know if you have started your repair or not, but I don't see why you would need to salvage a second CPS 2500 for parts as long as you have the two springs, two nubs, and whole selector intact from the first one.
From Ben:
Repairing this will require a fair amount of work but is possible. Personally, I would find a broken CPS 2500 and swap out the entire front part of the valve with the flow straighteners. That would be the easiest repair. Without that, I would simply attach a PVC threaded adapter to use screw-on nozzles.
It seems a little extreme to "swap out" the front part. That's the entire firing chamber, you can detach the rubber pressure chamber fairly easily but removing the intake tube has a high chance to crack in my experience, and at that point you might as well swap out the pump assembly as well.
But it might not be possible to use screws to attach the nub if the inside of the front end of the blaster needs to be sealed. I think it's probably okay to screw through the top part between the two openings but I'm not sure on the other sides.
It would need to be sealed. But conveniently, there is just enough room for some nuts and bolts.
You will have to open the CPS 2500 first, but that part is fairly easy. Put the nozzle selector to the side. Put the old screw and plastic bit to the side.
Drill a hole through the center of the broken part. Put a long and skinny machine bolt with a fender washer through the back of the nozzle selector.
Remember that plastic bit? Drill a hole through it big enough for the bolt to go through easily, and cut it to just the right thickness, making sure the selector will rotate smoothly on it. It should sit flush with the plastic from the nozzle selector. If you can't, you will need a vinyl washer or spacer cut down to the right size.
Screw a nut onto the bolt for now so it doesn't fall through, and reassemble the 2500. Remove the nut.
The nozzle selector has a fairly large hole in it, and you will need a slightly larger washer (but not too wide) to go in the center of the three nozzle settings.
Now put the nozzle selector on the machine bolt and add the washer, lock washer, and finally a nut. The lock nut should keep it from ever unscrewing but will allow you to rotate the nozzle selector no problem.
The hardest part for you may be finding the right nuts and bolts, but they are commonly available. Good luck!

