CPS 1500 Repair Guide
Posted: Fri May 23, 2014 1:04 am
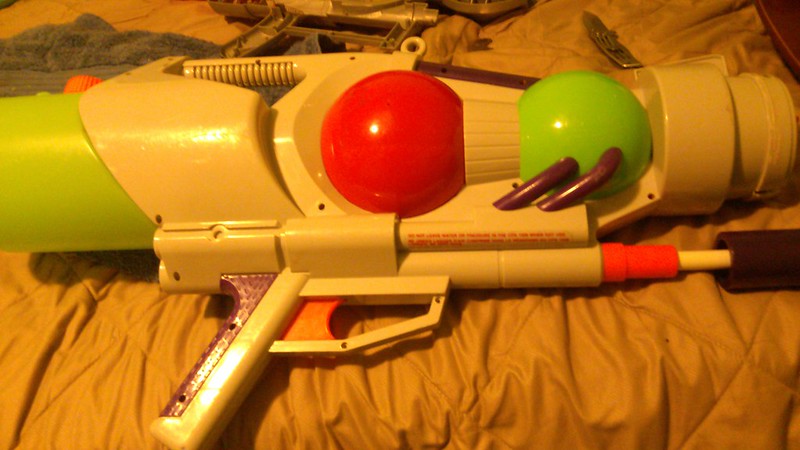
So I decided to open up my latest CPS 1500 and make a guide while I'm at it.
It's a CPS 1500 MK II (I'm calling it)... this is the version with the smaller selector plate.
*EDIT* I am no longer sure which is older, I have two CPS 1500 that seem ancient but of different marks, so... yeah. Call it what you will!
For starters, let's review the symptoms.
-It won't pump air, the gun will actually pressurize with water just a little bit, about 3 pumps, then the OPRV will kick in with a horrible noise.
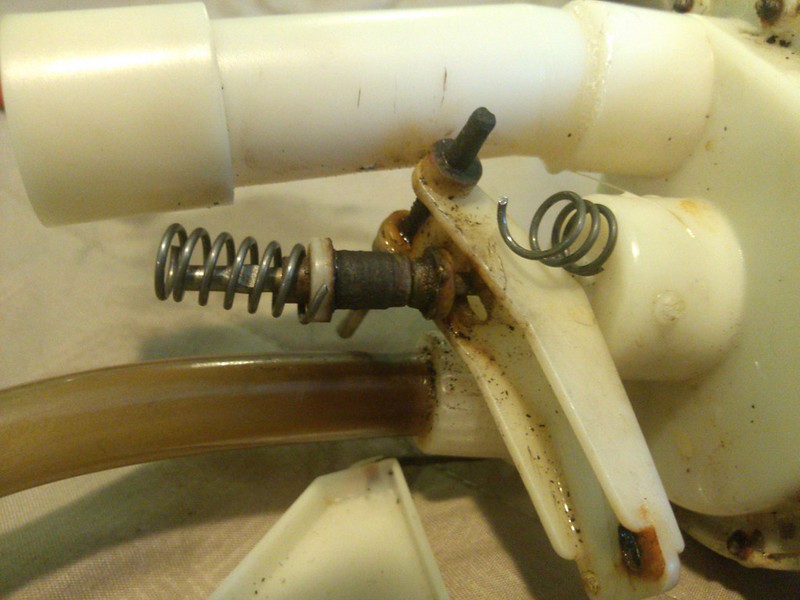
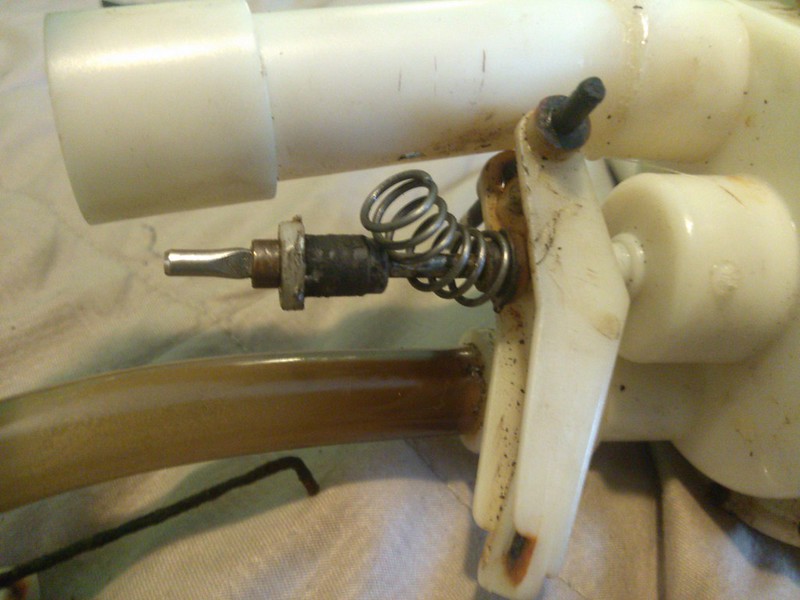
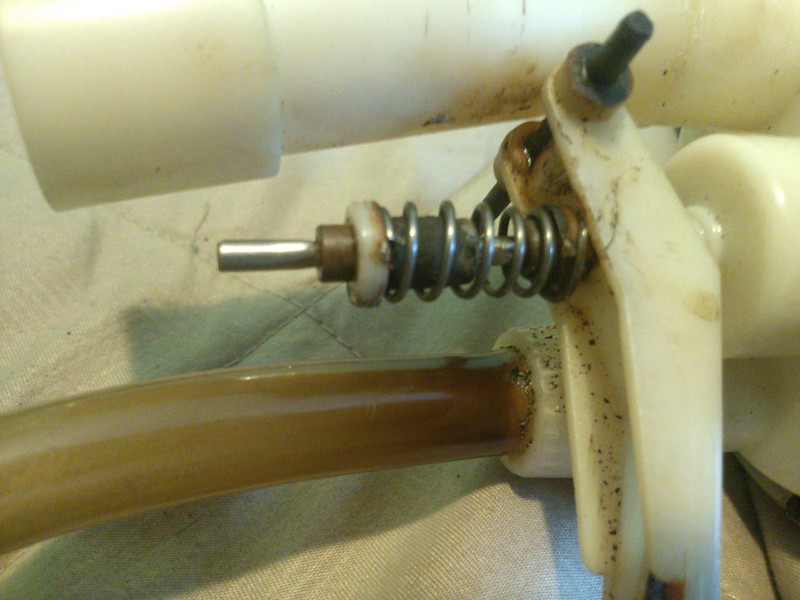
-The trigger is sitting back a good 1/4" from the normal position, while still pressurize-able. I would guess the outer spring has rusted into oblivion.
-So if you pull the trigger back/forth, it will actually open and close the valve. There is just enough friction to prevent it from closing without significant water pressure.
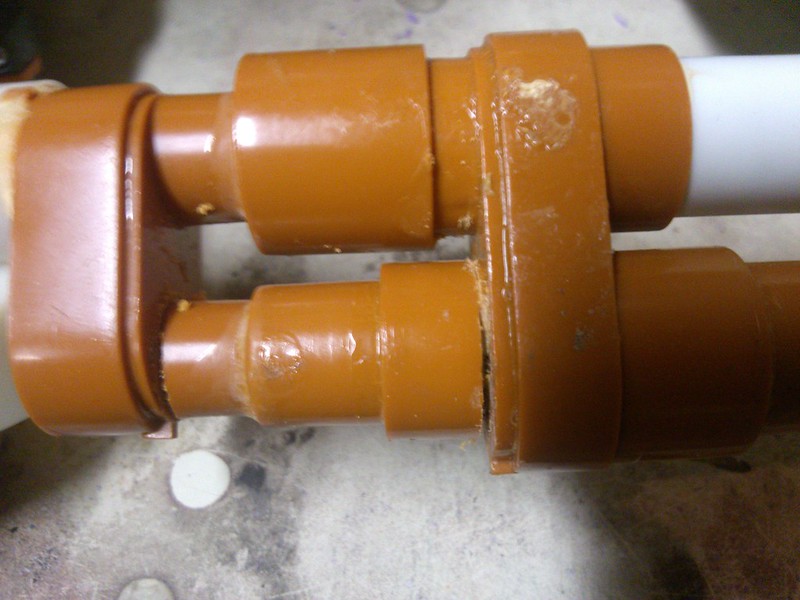
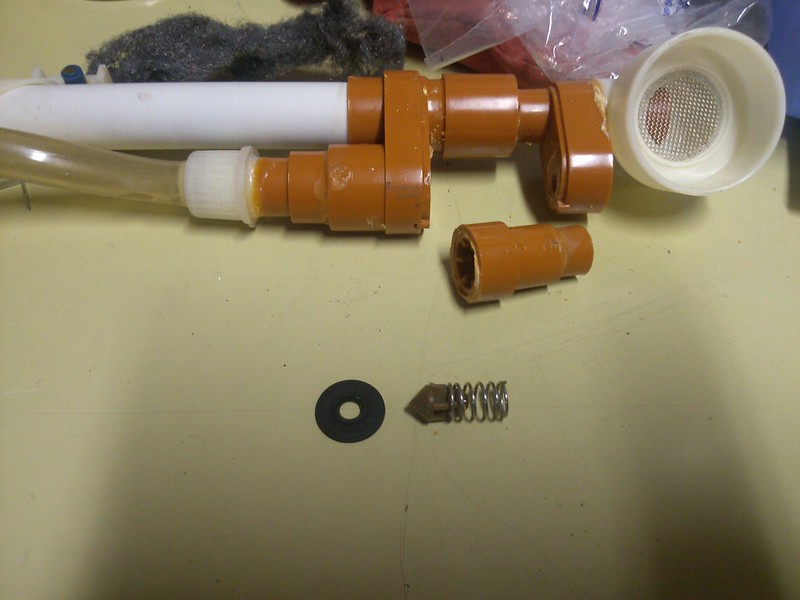
-The nozzle screw, and probably spring, is rusted badly and the selector is stuck quite solidly in the 10X position.
This thing had to have been kept UNDERWATER for some time, in order to rust like this!
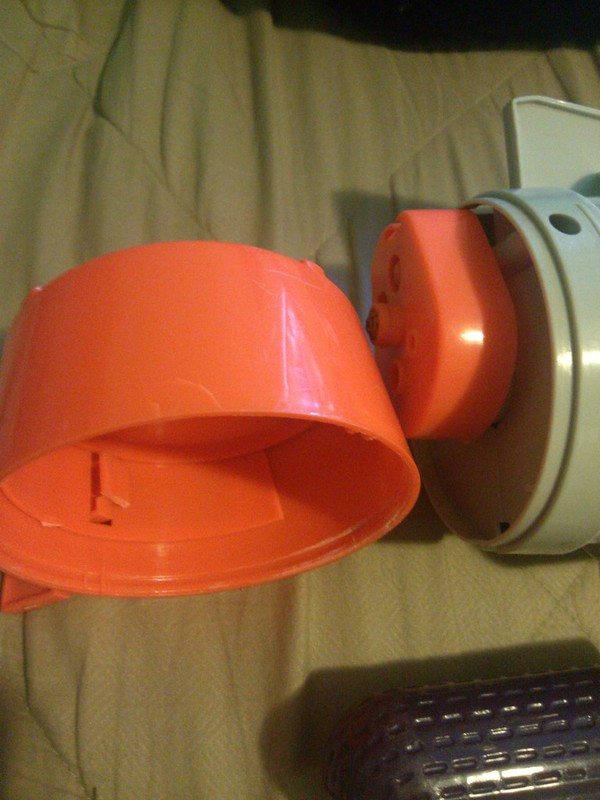
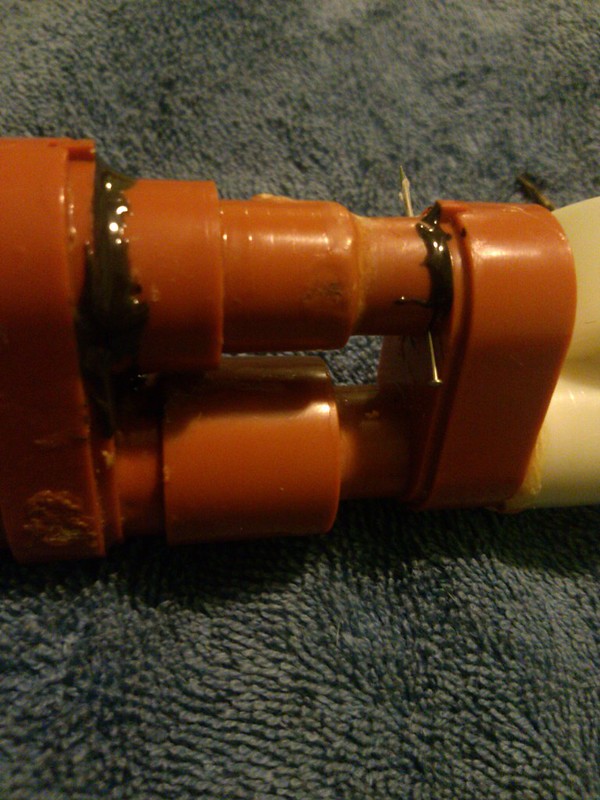
Anyways, this version has a threaded pump cap and the nozzle cover glued on. So now I go, crap, how am I going to remove this?
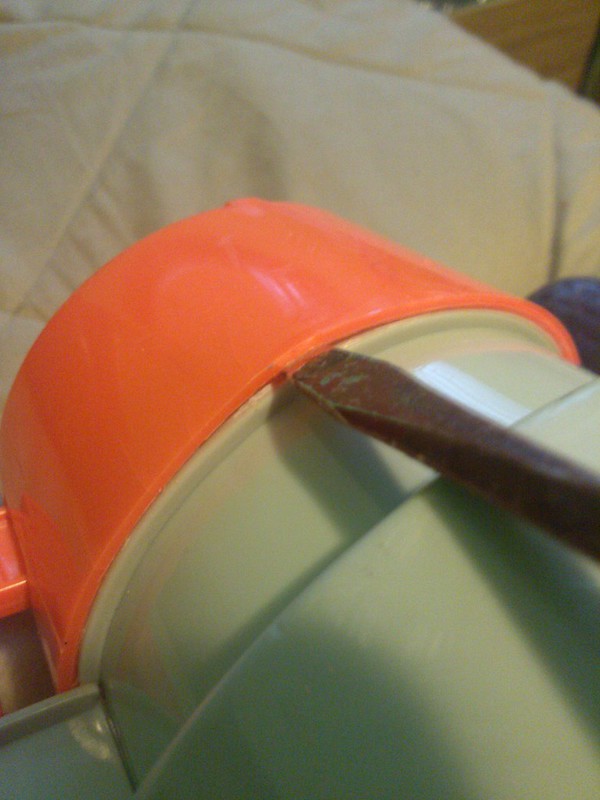
Well the answer is... carefully, with a flat screwdriver. Here are some pictures:

I started with the edge near the selector tab, where there was the least resistance. From there I went around the rim and carefully pried up the edge bit by bit.
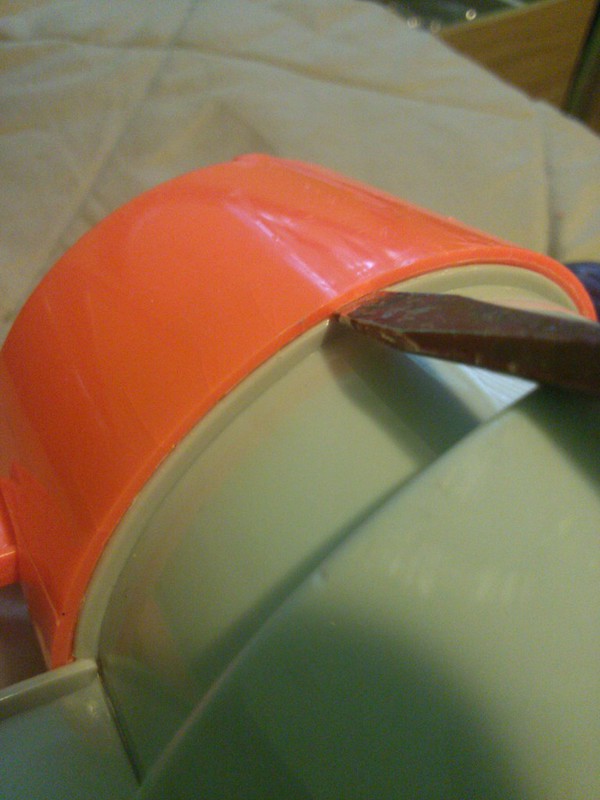
You don't want to pry too hard or put the blade in too far, or you will simply break the cover into little pieces. Given that these things are ~15 years old, the plastic will be somewhat brittle, so expect the whole thing to crack a little bit, but if you are patient you should be able to crack the glue. I only messed up in one tough spot and made a fairly visible crack.
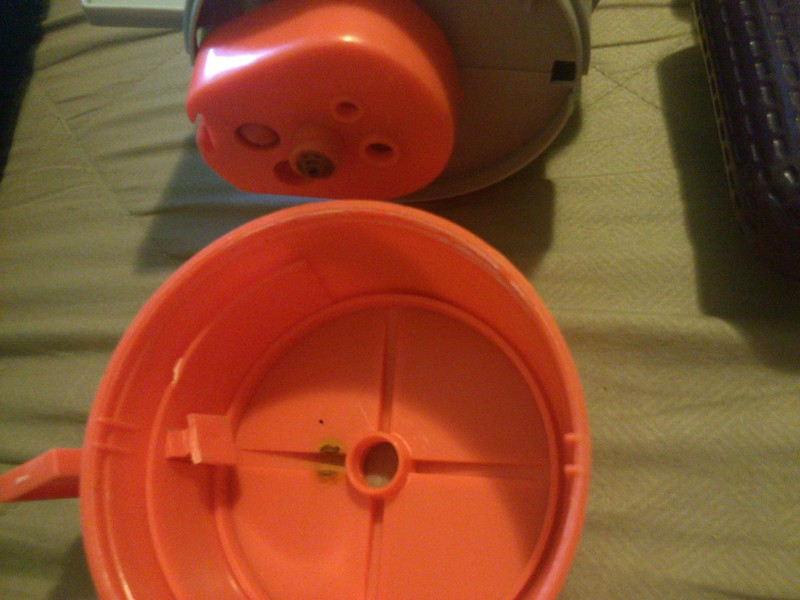
As it turns out, there are no screws underneath the cover on this mark (unlike the other mark of CPS 1500!!!). So if you take all of the screws out first, you may find it's actually easier to twist the shell and detach the nozzle cover (as I remember doing with my CPS 1700). Then again, you might have no luck with this method (like my other CPS 1700).
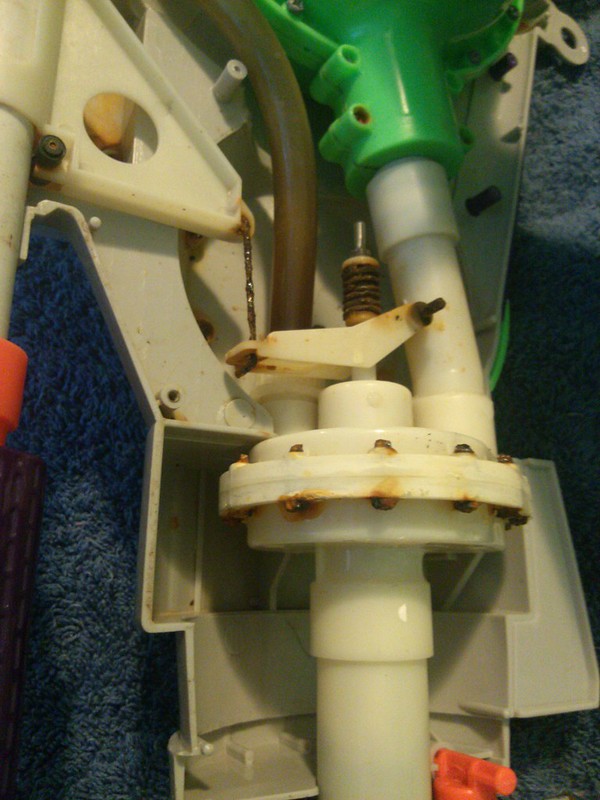
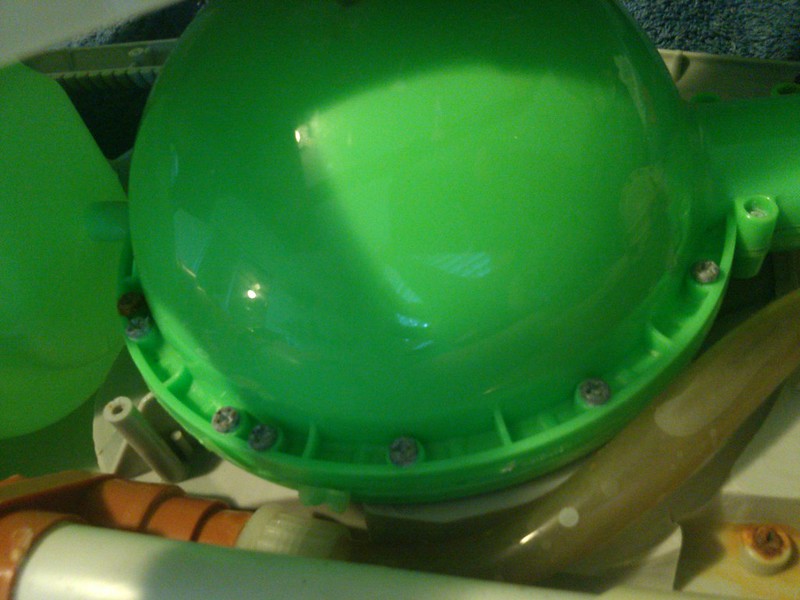
To Be Continued... tomorrow I will unscrew the gun and take a look inside. So look forwards to part 2 tomorrow!
It's a CPS 1500 MK II (I'm calling it)... this is the version with the smaller selector plate.
*EDIT* I am no longer sure which is older, I have two CPS 1500 that seem ancient but of different marks, so... yeah. Call it what you will!
For starters, let's review the symptoms.
-It won't pump air, the gun will actually pressurize with water just a little bit, about 3 pumps, then the OPRV will kick in with a horrible noise.
-The trigger is sitting back a good 1/4" from the normal position, while still pressurize-able. I would guess the outer spring has rusted into oblivion.
-So if you pull the trigger back/forth, it will actually open and close the valve. There is just enough friction to prevent it from closing without significant water pressure.
-The nozzle screw, and probably spring, is rusted badly and the selector is stuck quite solidly in the 10X position.
This thing had to have been kept UNDERWATER for some time, in order to rust like this!
Anyways, this version has a threaded pump cap and the nozzle cover glued on. So now I go, crap, how am I going to remove this?
Well the answer is... carefully, with a flat screwdriver. Here are some pictures:
I started with the edge near the selector tab, where there was the least resistance. From there I went around the rim and carefully pried up the edge bit by bit.
You don't want to pry too hard or put the blade in too far, or you will simply break the cover into little pieces. Given that these things are ~15 years old, the plastic will be somewhat brittle, so expect the whole thing to crack a little bit, but if you are patient you should be able to crack the glue. I only messed up in one tough spot and made a fairly visible crack.
As it turns out, there are no screws underneath the cover on this mark (unlike the other mark of CPS 1500!!!). So if you take all of the screws out first, you may find it's actually easier to twist the shell and detach the nozzle cover (as I remember doing with my CPS 1700). Then again, you might have no luck with this method (like my other CPS 1700).
To Be Continued... tomorrow I will unscrew the gun and take a look inside. So look forwards to part 2 tomorrow!