Replacing pipes in pinch valve blasters
Posted: Sun Sep 23, 2012 7:42 am
Here is the result of me replacing the pipes in an ss 50. I used a smaller OD pipe in this because the pipes are more rigid and 1/4" wouldn't let it compress fully with the strength/leverage generated by the metal pusher. Somewhere I have the original pipe, so brown and compressed no air could get through at all. I like this method because it lets me use old soakers as if they were new. Here's some pictures because I don't think it's been done before.
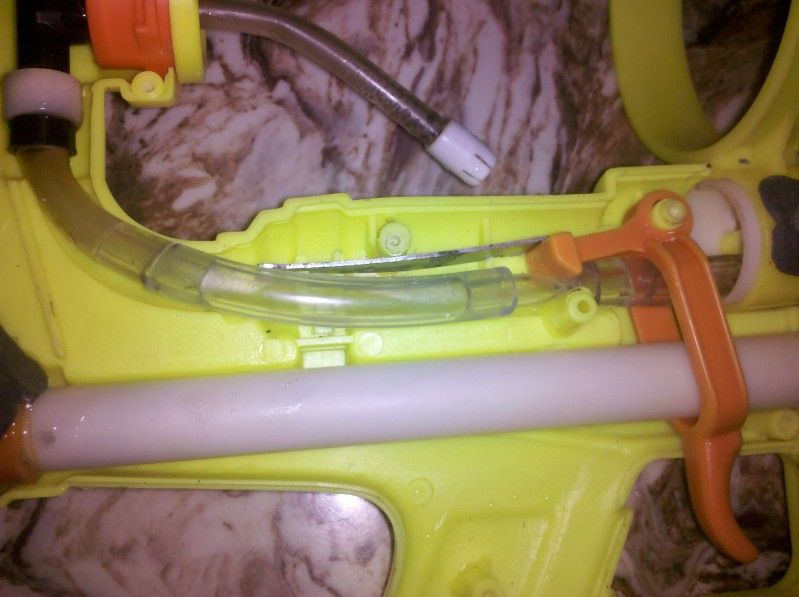
That's the whole system, it's 1/4" OD pipes inside 3/8" pipes. The OD of the original pipes are 3/8" according to WATTS pipe. The original pipes are slightly thinner ID then store bought pipes however, so I replaced the part under the pinch valve with 1/4" OD. Yes, you could just replace that section but it's a little loose of a connection between the original pipes and 1/4" and I fear that with the constant pressing it could come loose.
The trigger pressing against the new 1/4" pipe, there is no goop for this method. So long as you use long enough sections they become pressure fitted.
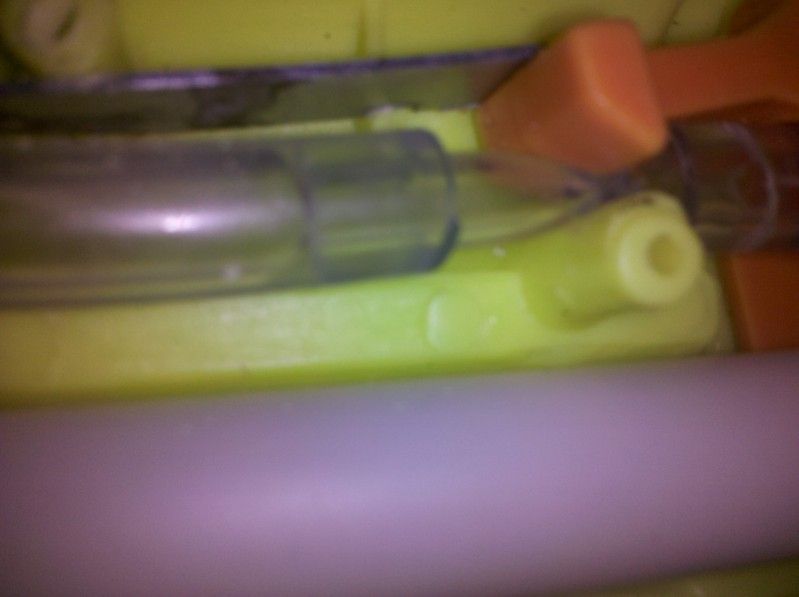
I had used longer sections here and connected the 3/8" to the main pipe by a 1/4". This step probably isn't needed but my pipe was really bad so I figured I may as well, plus it gets a better and tighter connection to the 1/4". I can't connect this pipe with a larger pipe because the shell wouldn't close then
So yeah, this is how to make old pinch valve blasters work like new.
That's the whole system, it's 1/4" OD pipes inside 3/8" pipes. The OD of the original pipes are 3/8" according to WATTS pipe. The original pipes are slightly thinner ID then store bought pipes however, so I replaced the part under the pinch valve with 1/4" OD. Yes, you could just replace that section but it's a little loose of a connection between the original pipes and 1/4" and I fear that with the constant pressing it could come loose.
The trigger pressing against the new 1/4" pipe, there is no goop for this method. So long as you use long enough sections they become pressure fitted.
I had used longer sections here and connected the 3/8" to the main pipe by a 1/4". This step probably isn't needed but my pipe was really bad so I figured I may as well, plus it gets a better and tighter connection to the 1/4". I can't connect this pipe with a larger pipe because the shell wouldn't close then
So yeah, this is how to make old pinch valve blasters work like new.