Trigger Valve Repair/Reinforcement.

For questions, articles, and discussions regarding water blaster modifications.
Post Reply
Neptune
Posts: 127
Joined: Sun Sep 16, 2012 8:41 pm
Location: NJ, 07755
Contact:

Trigger Valve Repair/Reinforcement.

Post by Neptune » Tue Jan 22, 2013 11:37 pm

I got a 105 that didn't pressurize because the valve was permently open. After awhile I got bored and decided to fix it so here we go.

Open up the blaster, mine was a XP 105 (Personal favorite from the XP line),

Image

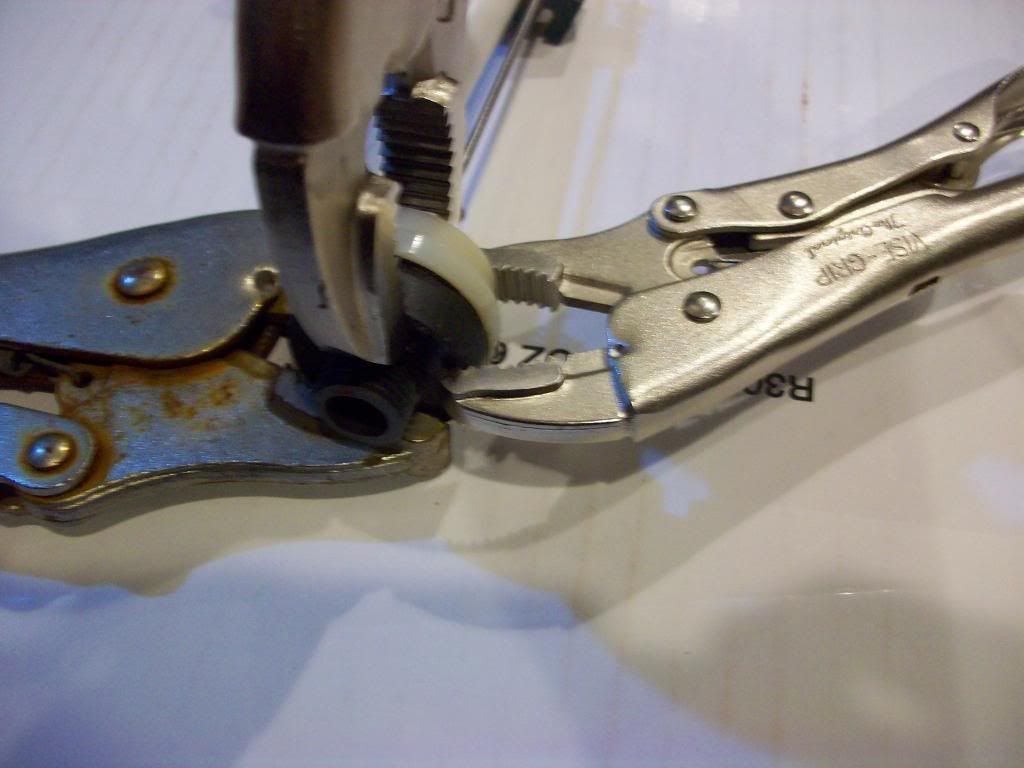
cut where the two plastics meet. For this gun it was on a lip made from a white piece over lapping a gray piece. Cut to about middle, stop, rotate it, and cut again. You want to cut all the way around this but not through it, as there is the rod in the middle.

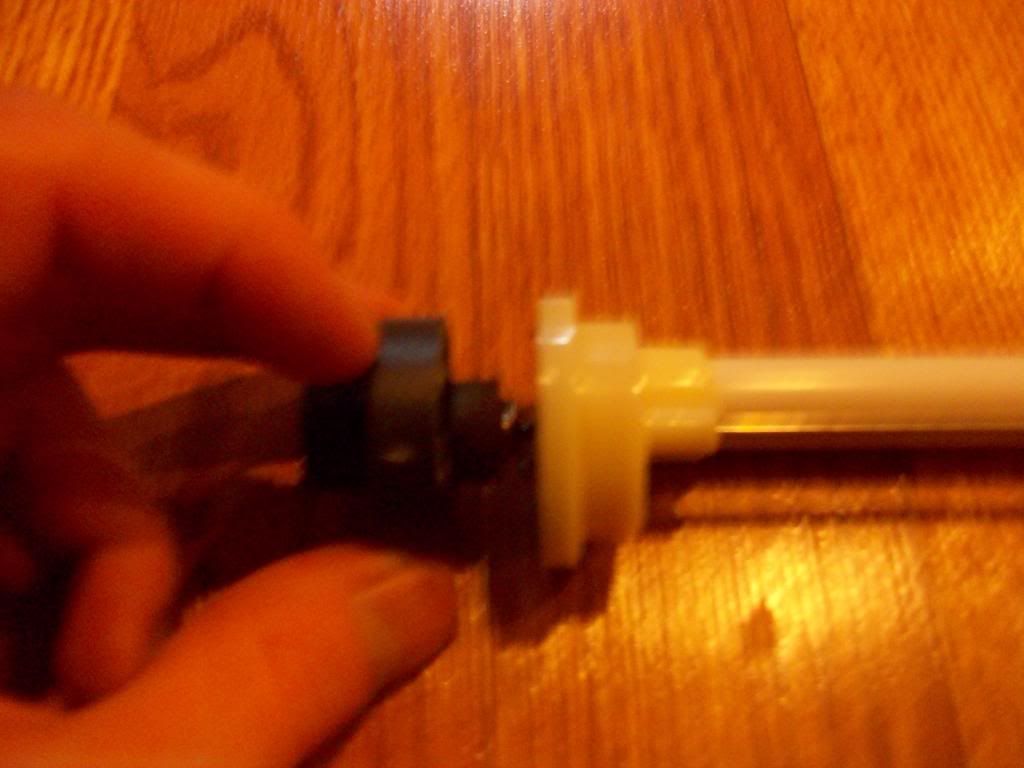
In this case, the spring was so poorly rusted touching it with a screwdriver broke a chunk off. It's why this blaster stopped firing.

I went to my local hardware store and bought a few stainless steel springs that were thin in size. You want one as close to the size of the outer diameter rubber grommet and O-Ring combo in the back, without going larger than them.

Cut the spring to the proper size (determined by a little longer than how far the gap between the back of the front seal and the gromet are with the housing fully closed. Just push the rod up holding the housing together, remove the top, and it all should stay. Measure that)
Image
Lifting the cover to check size, my spring is already there for that picture.

I used a dremal and diagonal cutter to do so. (I don't have any pictures of this, but if you would like I could take one)

Image
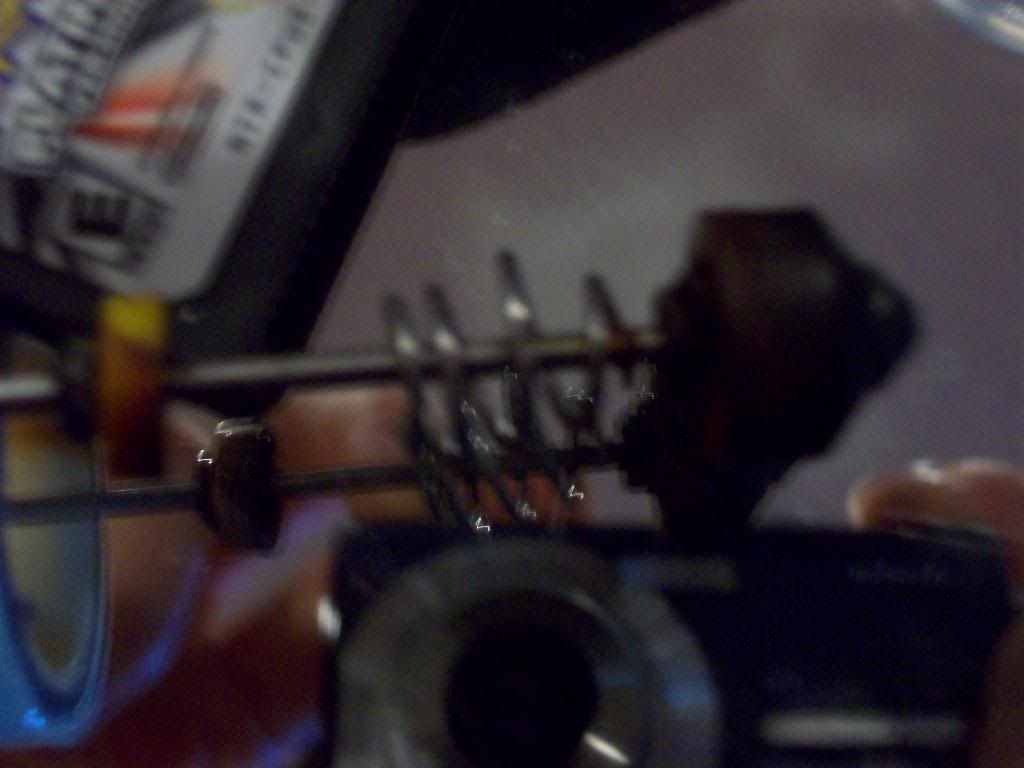
After this I bent the now cut spring around the rod at the top and bottom with some pliers, just to make sure it wasn't going anywhere. The top and bottom are bent smaller.

Image
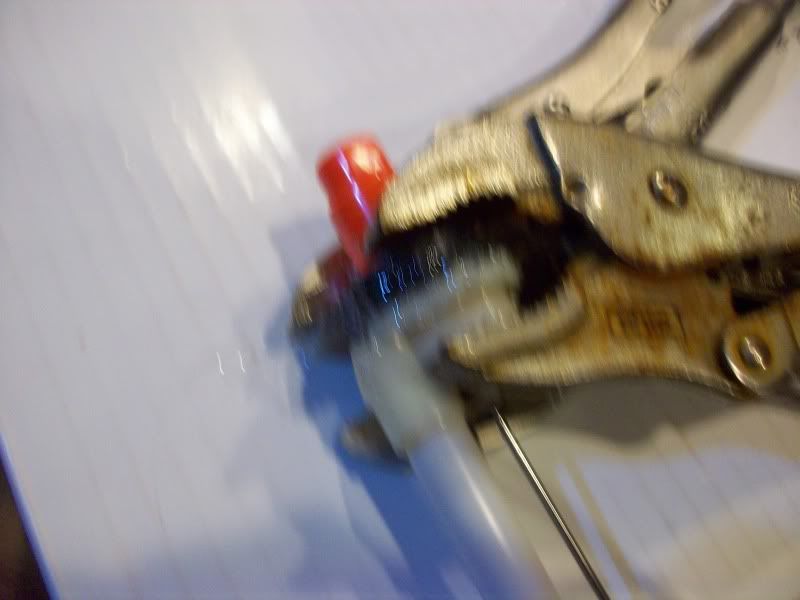
I then took the vice pliers out again and clamped this shut, making sure everything is still aligned, and used some goop around the edges to help seal it, flattening the goop with my finger. Shakey macro pics are my cameras specialty.

Wait a day. VERY IMPORTANT STEP. ( No picture of this step sorry)
After it dries blow down the front and back, making sure no air goes out either way, just to be sure the springs the right length.
Then wait a bit more, because you can never be too patient.

Image
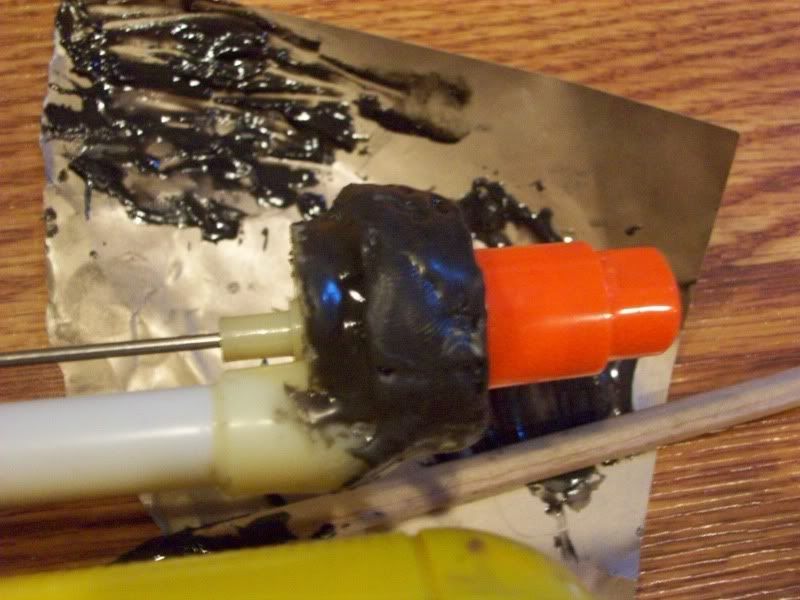
After that wait epoxy putty over everything, with the vice pliers still on.
Here you could throw some mesh-tape on here to make it max out at really high PSI, but that's for a different mod.
Image
After about an hour of this take the pliers off and put a little more on the tops. Connecting everything to make sure it holds.

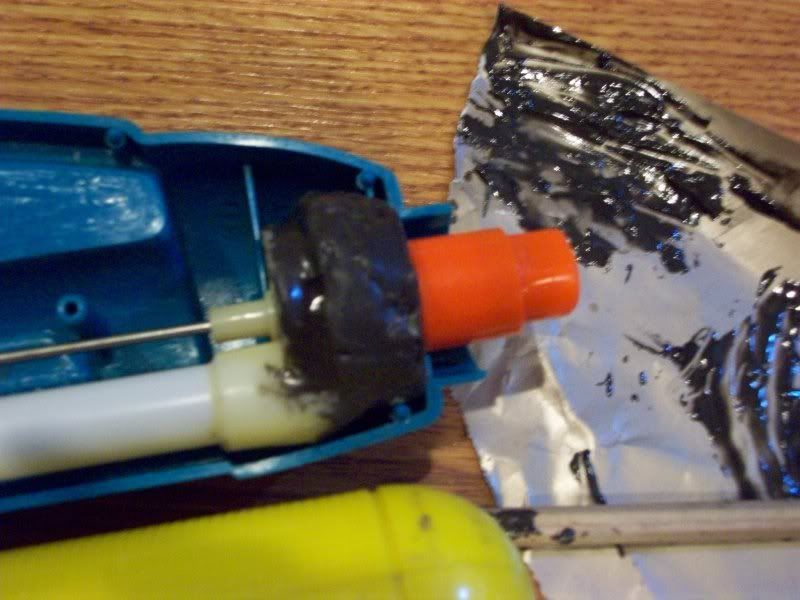
Then slap it in the shell, make any adjustments with a knife if needed, albiet unlikely. From here you could put a little more on if you want or missed any spots.

And you're done!
It now works again, and should be able to hold higher pressures while also being rust resistant.


After here I did some general maintenance things, feel free to ignore this next bit.

I lubed around the O-Rings on the PCs, and then gooped the outside of them, just in case something would leak. You can take goop off later if you wanted to swap the PCs or something anyway.

I also lubed the pump

To make this fire better I hot glued all over the spring at the back of the firing rod/pin that the green part pulls. This way the trigger can pull this all the way without having to worry, so more initial force. I'll get a picture of that next time I preform one. I really don't like springs behind trigger pulls.

I put some more resin on the trigger bar, and the green part the trigger connects to just in case.

I lubed around the nozzle to make it better sealed and easier to remove. I'm going to put some kind of rope on the nozzle so if I yank it off mid battle I don't have to worry about it falling and getting lost.

And that's my mod! Questions, comments, flames?

P.S. Don't use imgur.
I've got 110 problems but a <Nice lady> Ain't one

marauder
Posts: 3975
Joined: Tue Jul 20, 2004 9:29 pm
Location: Charleston
WWN League Team: Havoc
Contact:

Re: Trigger Valve Repair/Reinforcement.

Post by marauder » Wed Jan 23, 2013 11:18 am

This is really awesome. I don't know if there has been a post documenting fixing an XP firing valve before, or some of the side fixes you did as well. I just sold 2 broken XP 105s on ebay in a bulk lot, but it's been several days and the buyer hasn't payed. If for some reason this goes on a little longer or if they don't want the 105s and just want the working guns, I may have to try this or hook you up. They are pump firing, so I'm pretty sure it's the exact problem.
https://hydrowar.wordpress.com/
SEAL wrote:If you ain't bloody and muddy by the end of the day, you went to a Nerf war.

Neptune
Posts: 127
Joined: Sun Sep 16, 2012 8:41 pm
Location: NJ, 07755
Contact:

Re: Trigger Valve Repair/Reinforcement.

Post by Neptune » Wed Jan 23, 2013 11:36 am

I really love the xp line, and anything medium sized as I love running and rushing. Eventually I'm going to get a little better of a PC and a better reservoir for this blaster and that will be my AP primary. It's basically a fast pumping, two nozzle rush gun. I like it a lot.
I've got 110 problems but a <Nice lady> Ain't one

GJIV
Posts: 443
Joined: Sun Oct 31, 2010 8:21 am
Location: Earth: Austria
Contact:

Re: Trigger Valve Repair/Reinforcement.

Post by GJIV » Wed Jan 23, 2013 2:04 pm

I hate the XP 105...I got mine as a present it is a terrible gun ... Internals consists of 10 parts instead of one or two...each o-ring has a possibility to leak and I also had to fix the trigger valve ones...But besides, nice my friend :) I got mine working without opening the pressure chamber/valve directly but forcing the valve close from behind(where the stab for the trigger comes out).

Fishfan
Posts: 544
Joined: Thu Jun 07, 2012 9:06 am
Location: Florida
WWN League Team: Havoc

Re: Trigger Valve Repair/Reinforcement.

Post by Fishfan » Wed Jan 23, 2013 8:15 pm

My 105 act a little weird sometimes, sometimes it pump shoots, but when I pull the trigger once, it works for a good while, maybe stops after I leave it alone for a day or to. Btw, I saw marauder's gets about 28-29 ft angled, mine gets 42! Gets 29 angled.

marauder
Posts: 3975
Joined: Tue Jul 20, 2004 9:29 pm
Location: Charleston
WWN League Team: Havoc
Contact:

Re: Trigger Valve Repair/Reinforcement.

Post by marauder » Wed Jan 23, 2013 8:58 pm

How does yours get 42 feet straight but only 29 feet angled? Did you mean 32 feet? That's the average range i've recorded out of several 105s http://hydrowar.com/xp105.html
https://hydrowar.wordpress.com/
SEAL wrote:If you ain't bloody and muddy by the end of the day, you went to a Nerf war.

Neptune
Posts: 127
Joined: Sun Sep 16, 2012 8:41 pm
Location: NJ, 07755
Contact:

Re: Trigger Valve Repair/Reinforcement.

Post by Neptune » Fri Jan 25, 2013 3:14 pm

GJIV wrote:I hate the XP 105...I got mine as a present it is a terrible gun ... Internals consists of 10 parts instead of one or two...each o-ring has a possibility to leak and I also had to fix the trigger valve ones...But besides, nice my friend :) I got mine working without opening the pressure chamber/valve directly but forcing the valve close from behind(where the stab for the trigger comes out).
I usually would try that first, but in the case of this 105 and my 110 the spring was so badly rusted that it crumbled from rust. Because of that if you only push the back it will start to leak from the back, because there's nothing to seal the grommet and o ring at the back of the firing valve. Pushing from the back works when the spring starts to weaken, but not when its fully corroded.
I've got 110 problems but a <Nice lady> Ain't one

Neptune
Posts: 127
Joined: Sun Sep 16, 2012 8:41 pm
Location: NJ, 07755
Contact:

Re: Trigger Valve Repair/Reinforcement.

Post by Neptune » Mon Jan 28, 2013 3:04 pm

If people remember my old post of the 110, this method fixed it. It works like new now and is very well sealed. Though a note for anyone doing this? I used too much epoxy resin on the side and I had to file it down to fit in the shell. As the paper towel commercial goes, less is more.
I've got 110 problems but a <Nice lady> Ain't one

Post Reply

Who is online

Users browsing this forum: No registered users and 45 guests